Showing posts with label Kiln Construction. Show all posts

Tuesday, April 17, 2012

Kiln Construction: Day 6 & 7

 Due to the high amount of rainfall I wasn't able to commence work on the kiln again until Easter. So I spent Good Friday and Easter Saturday getting the kiln almost finished. I built the walls and added an additional metre to the height of the chimney.

Adding walls.
Wall, stoke hole and door.
Adding exterior wall.
  
End of day 6.


Adding additional height to the chimney.

Kiln just before sealing chimney with mud.

I now plan to return to fire the kiln very soon. I do however, need to create some work to go in it, prepare the wood and put a final layer of insulation (clay & sawdust) over the arch of the kiln.

Wednesday, April 11, 2012

Kiln Construction: Day 5

I set about constructing the dampers, chimney and removing the arch form during day five. This time without any major mishaps.

Constructing the dampers

Dampers for the chimney and passive dampers at the base were included

Kiln with the arch form removed

First section of the chimney added

Tuesday, April 10, 2012

Kiln Construction: Day 4

I returned to Canberra after day three. I didn't return until mid January when there was a cool change. This time I needed to complete the dampers and chimney. I had a slight mishap however, I got a bit too eager and tried to remove the form from the arch by myself. The form twisted when I tried to remove it and knocked the whole arch and firebox down. I had to reconstruct the firebox and arch all over again!  This error cost me an extra day.


Oops! Start again...Kiln cleared ready to rebuild.

Reconstruction of the arch take two.
Front of the kiln with extra layer of bricks and stone buttressing


Tuesday, March 27, 2012

Kiln Construction: Day 3

Day three of the kiln construction saw the hot weather continue. The first thing I attempted to do was to complete the flues.


A passive damper was created for each of the exit flues into the chimney as shown below.


The form for the arch was then placed on the kiln floor using bricks to raise it so it could be removed later on.

Bricks were then laid to follow the arch.

The arch was eventually completed by placing the last key bricks in the top of the arch.


Sunday, March 25, 2012

Kiln Construction: Day 2

Construction on day two started early as the weather forcast was for a max of 34 Celsius . First was the construction of the firebox.

I then started construction on the platform (kiln floor) which needed to be lifted up above ground level. To do this I used large stones and broken brick to fill gaps.


A course of red brick was laid on top of the stone platform and leveled with a fireclay and sand mix before the firebrick floor was laid.


Sunday, March 4, 2012

Kiln Construction: Day 1

After traveling from Parkes with the last load of fire bricks it was time to start construction. Common bricks, stone and rubble will be used to support the chamber floor. Local red bricks will be used as foundation under the firebox and chamber floor. It is a hot day but I start digging out a hole for the firebox. Fortunately the heavy clay soil is moist but heavy none the less.


Kiln site - gravel only


Red Bricks at the rear of the site

Digging room for the firebox
Initial layer of redbrick laid on a thin layer of sand\gravel


2nd Course of red brick with firebrick for mouseholes (air inlets for under the floor)


Knock off time - firebox floor complete


Saturday, February 25, 2012

Building the form for the arch

Once I had cut the catenary curve into two identical pieces of plywood, I started building the form for the arch my connecting the two pieces together with a series of wooden battons (70x30mm Pine).


Once the battons were in place I attached a thin sheet (3mm) of ply over the top of the frame. The finished form will be used to hold up the brick arch while it is being constructed. The form will be taken out, of the kiln, once the arch is completed.

As I will be transporting the form from my home to 'Spring Creek' some 375kms away I have made sure it fits neatly in a trailer.

Tuesday, February 21, 2012

Calculating the number of arch bricks needed

After I had drawn the catenary curve on a large sheet of plywood. I cut it out using a band saw and used it to calculate the number of straight and arch bricks needed. I used the spare bricks the ANU ceramics workshop had on hand to see what was the right combination of bricks, to fit the curve, before I ordered my own bricks.

Monday, February 13, 2012

Building the Spring Creek Kiln: The Design

Once I had the kiln site selected I started to plan and design the kiln to suit. I didn't want to transport too much to the location so I planned to use materials around the farm as much as possible. As long as I could:
  • Build it by myself
  • Fire the kiln by myself using timber found on the farm
  • Get the kiln to cone 10
  • Get ash deposits on the work
Because I was happy with the work I had been getting out of the ground hog style kiln that Fred Olsen built at Strathnairn I borrowed his book The Kiln Book and applied many of the design priciples he advocates in it. I also used Handbook for Australian Potters by Janet DeBoos, Stephen Harrison and Leonard Smith to guide me in the selection of construction materials.

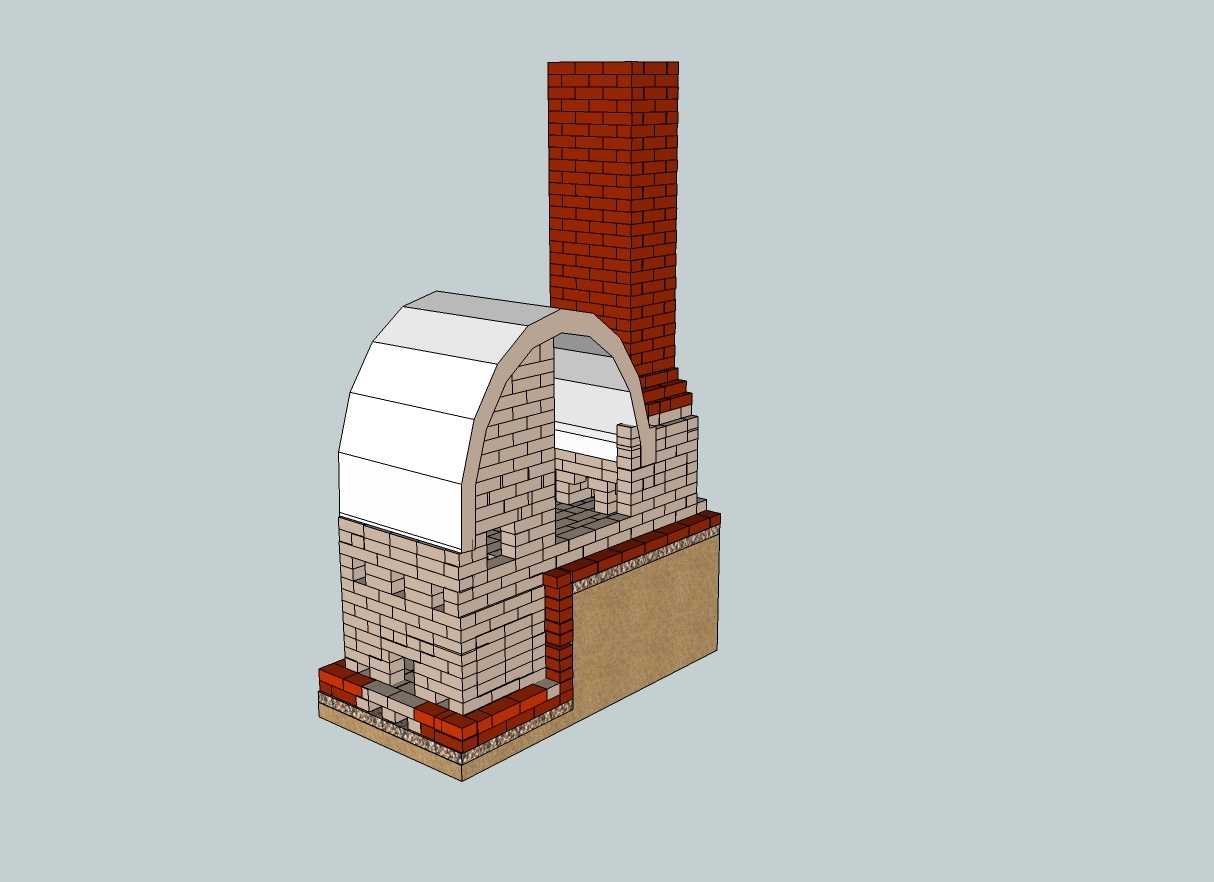
The picture below shows the internal lining of the kiln and chimney which will be made predominately out of solid red bricks found on the farm.

2011 Original Spring Creek kiln design

Saturday, February 11, 2012

Building the Spring Creek Kiln: The Site

After firing my work in the ground hog style Olsen kiln at Strathnairn in the ACT. I decided I would attempt to build a wood kiln on location and fire my work in it using wood available on the farm to complement my project. At this stage I didn't have a design or plan, instead I selected the site first. As the creek that runs through the farm floods I needed something on higher ground. I selected a spot which was up from the house and on a slight slope.


late 2011 selecting Kiln site
The soil on the site is quite heavy and contains a lot of clay. As I plan to minimise the materials I transport to the location and use a range of available materials, I saw this as an advantage. I got my father to clear the site with the tractor.


late 2011 clearing the kiln site